Saturday, April 10, 2010

Spars

Short entry this week. We were on spring break for a little bit, so I got to go home and put some holes in one of our walls. They look nice, but again I have the camera issues, so no pictures. Same issue with the boat. . . not a lot of pictures.

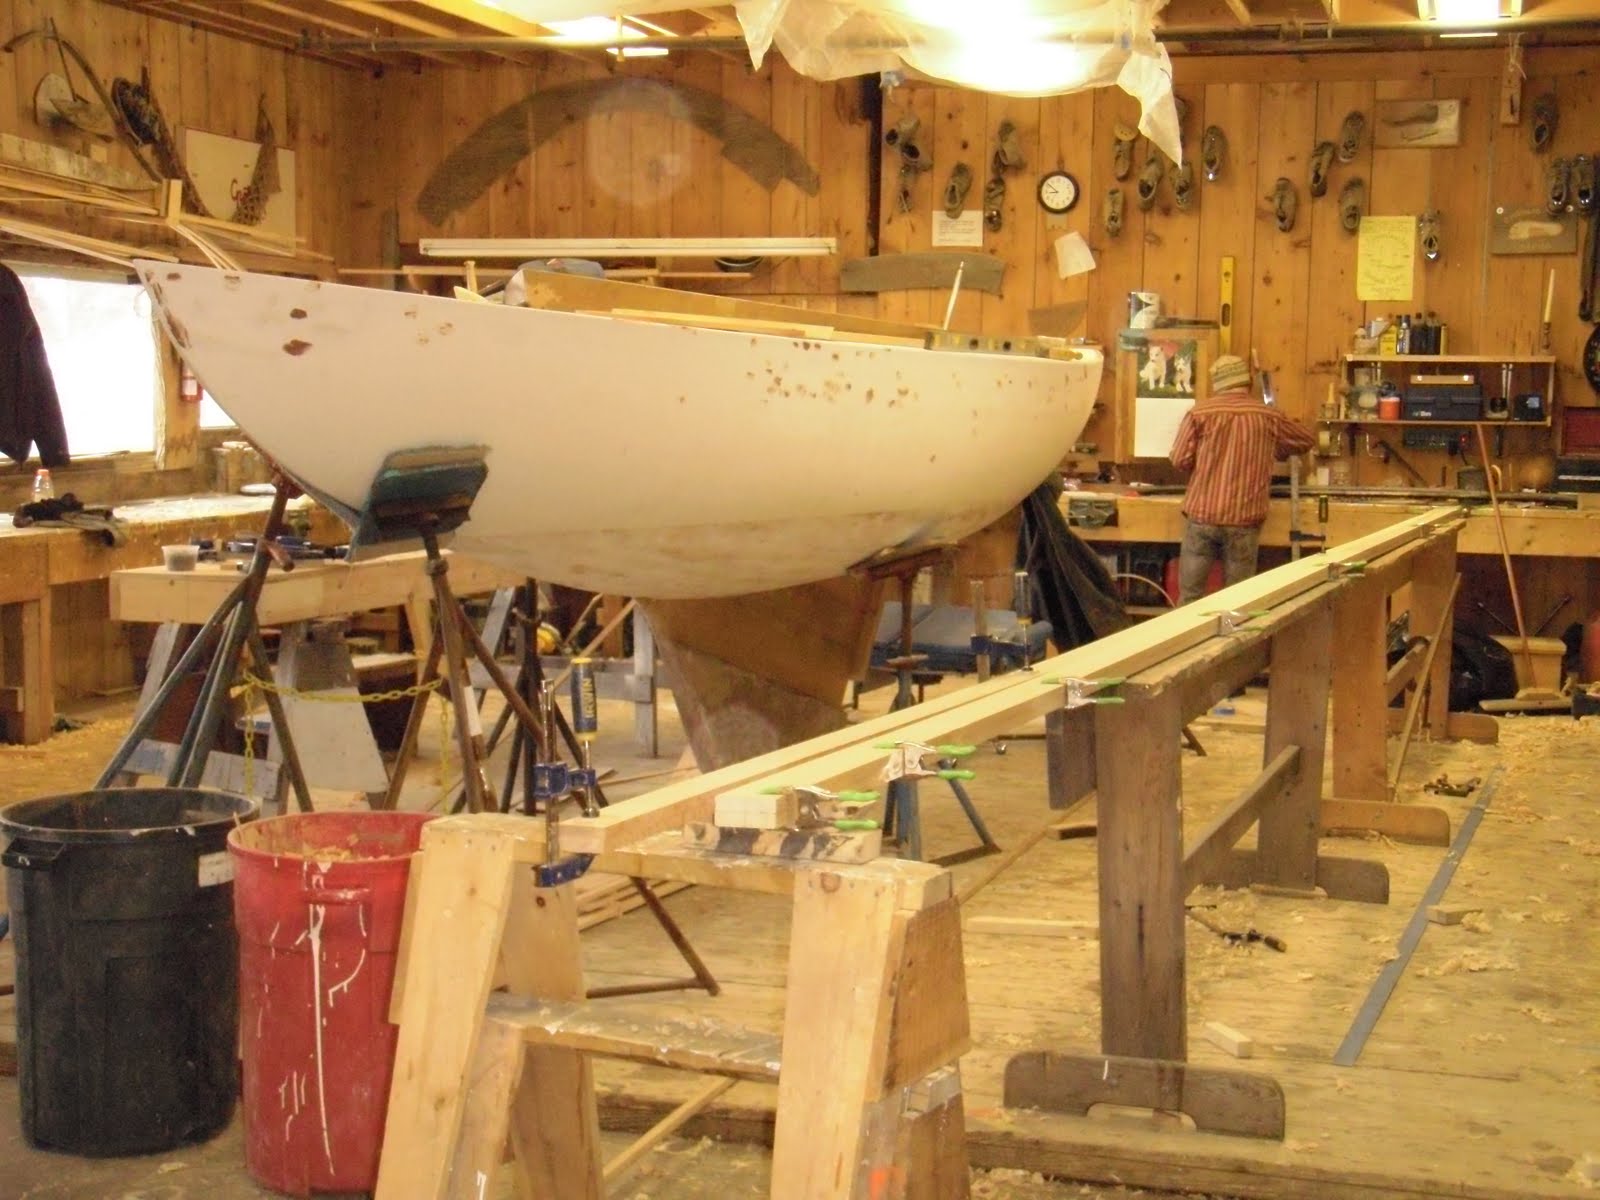
I did get the camera working for this post, however. The mast is all put together. Looks pretty simple, just a long box, but there is internal structure (forever hidden) and a cool glue up jig that has now been taken apart. Oh well. The result is nice.

I took this picture of the bottom of the mast to give you some idea how this thing is put together. The bottom is actually the most complicated part, with internal blocking on all 4 walls as well as a center piece. About 80% of the mast is completely hollow, and only the very top and bottom foot of the mast are completely solid. Ignore the screw, as that is just for hanging the mast while I varnish it.

The 2 side pieces (call them the walls of the box) have a 1/8" rabbet in them which give a good glue surface / alignment aid for the top and bottom pieces. Before I glued up the box, however, I glued pieces onto the inside of the walls at the bottom of the mast, about 15' up (to support the spreader), and about 23' up (to support the jumper). At the very top and bottom I put in a center piece to make the mast solid.

To glue up the mast I built a 30' long bench. I use the term bench loosely as it was only 2" above the floor. That was all we needed to get a clamp under it for the glue up. The bench also gave me a surface to draw out the shape of the mast (it is curved from bottom to top) so as we glued it up we knew we were gluing it up correctly.

Inside the boat, the seats and sole are coming along. There will be little storage shelves behind the seats, underneath the combing.

The Haj is starting to look really good. This is the view from our boat. Pretty nice work environment.

Next post. . . Launch day! No, not for me, but the small boats are getting thrown in the water.

Saturday, March 27, 2010

Slow Progress

The other title for this post could be "Lots of little jobs that don't add up to much"

I've switched gears into hardware / mast mode while Pat and Phil have been working on the interior, so the boat looks a lot like it did 2 weeks ago. The annual boat show in Portland was this weekend, so we cleaned up the boat and work area for a photo shoot. Still no takers, so the boat can still be yours! Buy now and you get to pick the color.

I went up to Sommes Sound on Mt. Desert Island to look at the original mermaids again. Spent a couple hours measuring the locations of fittings on the mast, cleat sizes, line sizes, and talking to an owner about how he set up the running rigging (sheets / halyards). Pretty exciting stuff, as now I know how the rest of the boat is going together. There is nothing left but to buckle down and finish her.

To that end, here is a preview of the cockpit layout, which in my humble opinion, will be nicer than the original mermaids, as the sole and the seats follow the curve of the combing.

One interesting problem is how to make the hole for the rudder post perfect. It is a 1 1/2" diameter hole which angles thru the keel in such a way to hit the back edge of the lead. There is about 3' between the bottom of the keel and the lead. Here is the solution.

I start by drilling a 1" hole as best I can, with help from my partners sighting the virtual line from the bottom of the keel to the lead. Then we put a 7/8" rod into the hole and line it up using the bearings you see in the pictures clamped/screwed to the boat. The trick is the rod has a place to hold little cutters which you can stick out anywhere between 0 and 1/2 inch. Once everything is lined up, I can slowly push out the cutters, do a little drilling, and make the hole larger, so even if the original 1" hole was off center, or at an incorrect angle, by the time I've expanded it to 1 1/2" it is perfect.

I'm now waiting for a bronze fitting to continue with the rudder work, so I've switched gears to the spars. The spars are pretty simple on this boat. They are not round, which was a little bit of a disappointment to me, as I have yet to make something round, but I still have the tiller and the spinnaker pole. The boom is a simple T shape.

The mast is a hollow box, which tapers from the bottom to the top. I spent a few days laying / cutting these side pieces out, much like I would cut out a plank from a long piece of cedar. These are sitka spruce, by the way. The side pieces are only 11/16" at the top, and I had some bad grain run out, so as I was planing down to the final thickness, one of them snapped off. Bummer. Oh well, better to find out now than at the launch. I chopped off the one that made it thru but still looked sketchy and scarphed on new pieces.

Not too exciting yet, but I now have all the pieces, so this should get glued up next week.

I also awoke the inner engineer and made a spreadsheet of all the fittings we are going to need. In total, there are about 100 individual pieces. A couple will require the services of a welder, 2 will be custom castings, several will be homemade, and the rest will require a lot of cold hard cash. Almost everything will be bronze. There is a salty old collector (and I mean that in the kindest of ways) nearby who has almost everything we need. He collects old hardware, cleans it up and resells it. His property is something straight out of a Wooden Boat feature. . . a small cedar shaked house on the ocean, a large workshop with hardly any space to walk thanks to years of not throwing anything away that could be useful, and a 40' trawler in the "temporary" attached shed which has been in the works for 10 years and launches this summer.

In other shop news, the Haj is all buttoned up and they have begun fairing. They replaced the rudder post, which (knock on wood) should be the last backwards movement on this big renovation project.

Sunday, March 14, 2010

The boat just got a lot bigger

I thought a lot about how to get this ungainly piece of lead and wood aligned properly underneath the boat. Having a couple of bolts in the keel at the start, just barely sticking out of the top seemed like the best way to align the thing with the holes in the bottom of the boat. At first, I thought we'd roll the keel under the boat, align it, and jack it up until we could tighten the bolts. The last step is easy, but how do you roll and align the keel without tipping it over at some point and crushing the volunteer who is helping you out?

The solution was to leave the keel in place, and align the boat to the keel. We've got video of this process, but I haven't been able to upload and edit it. Hopefully I'll have it for the next post. But this picture should give you the basic idea. . .

We used a chain hoist to position the boat above the keel. Side to side alignment was easy since the chain hoist could be moved along its support beam left and right (relative to the boat). We were about 8" off front to back though. No problem. . . just put the boat on the popits, move the straps to change the center of balance and then lift the boat again. The boat moves forward or back to balance depending on how you move the straps. We did this twice and got within 1/2". At that point, we just asked a bunch of folks to push the boat into position while we slowly lowered it onto the bolts.

Things are moving swiftly now since last time was a bunch of prep work. The dynel for the deck went on pretty easily. The only part which took a little patience was the wrap around the deck.

The one thing I forgot about when we started this process at 4 in the afternoon is that you want to trim the excess cloth off about 4-5 hours later when the epoxy starts to set, but is still "green." Otherwise you have to grind it off the next day when it is hard as plastic. So we had to head back to the shop around 10 at night to clean everything up.

To finish off the edge of the deck we fill in the the rabbet (along the side of the boat) with thickened epoxy (the rabbet is 1/8" deep and the dynel does not fill it in), sand it fair and then round it over.

Remember the cockpit combing? Time to get that in position. Clamping it to the carlin and screwing it into the cockpit area is easy enough. But what about the big curved and twisted area up front? Sure we steamed it, but that was a couple weeks ago, and 3/4" white oak likes to be, well, straight. After trying to wrestle these pieces together with big bar clamps that stretched into the cockpit as well as over to the sides of the boat, we finally gave up and spent some time to set up a proper clamping jig, braced off the ceiling.

The last step was to drill 3" screws up through the deck into the combing. That went o.k.

A little paint, and now she looks like a real boat!

This shot gives a little hint at the next step. Look behind the keel and you'll see a little sighting set up we used to drill the hole for the rudder rod. This is a 1 1/2" hole that has to be angled perfectly to hit the back of the keel along the centerline of the boat.

Before I sign off, just a couple updates on the rest of the shop.

Susan Skiff land is cranking. . . all the boats have their planking (sides and bottom) completed.

The A&R tender and Whitehall are almost done as well.

Thursday, February 25, 2010

A few days of preparation

The boat doesn't look all that different from last time.
Except, of course, it's up in the air.


We finished up the 2nd layer of decking, but didn't have the Dynel in, so we shifted gears and started working on the keel. Before I get to that, here is how the Dynel will fair into the boat.


Look closely, and you can see a 1/8" X 3/4" rabbet cut into the boat. Starting at the edge of the boat and going down you see the 2 layers of plywood, then a light strip which is actually the planking, and then another dark strip, which is actually a corner. I used the fancy plane modeled in the picture. I never got to use all the depth and width fences before. Works really sweet. The Dynel will be put onto the deck and wrapped around into the rabbet. It will be wet out with epoxy which will hold it down and seal the deck.

But no Dynel yet. So we put the boat up on popits and started messing with the deadwood. The first step is to fit the top of the deadwood to the bottom of the boat. It took me about 10 fittings before I was satisfied. Getting that wood clamped into position was not all that much fun, but it was a good workout. The deadwood weighs around 80 - 100 lbs.


Next we gather all the pieces together.


The deadwood pattern is back, and screwed to the boat. At this point we have drilled small holes (8 of em) through the bottom of the boat and just barely into the deadwood where all the keelbolts will go. We then stick a long drill bit through the holes while the pattern is in place. We mark where the drill bit wants to go on the pattern, line up the pattern on the actual deadwood and now know where to drill the big holes in the deadwood. It takes 3 of us (1 to drill, 1 to sight left and right and 1 to sight fore and aft), but we can then drill an accurate hole through the deadwood.

One reason we drill the deadwood first is that it is the easiest to fix if we screw up. The landing pad for the longest bolt (33") is about 1 1/2" square at the top and the bottom. And the bolt is 3/4" wide. Not a lot of room for error. But if we can get the deadwood drilled correctly, it will be pretty easy to drill thru the floor timbers and lead, using the deadwood as a guide. And if the deadwood is not drilled correctly, you just tap a dowel into the errant hole and do it again the next day.

Here the deadwood is set up for drilling out the lead. You can see the lines that indicate where the holes are. We clamped these together and Pat spent a couple days drilling lead. Once the lead was drilled out, we put the deadwood onto the boat and drilled the other direction, up through the boat.


The bolts are ready. . .


The deadwood and lead are now temporarily bolted together. This will allow me to fair the oak into the lead. I have to take off about 1/8" on one side.


Today we thought we were pretty much ready to put the keel onto the boat. Unfortunately, when Pat drilled out the last hole, we found a huge void in the middle of the lead. Oh well, we'll have to do a miniature lead pour on Monday. But after these few days of preparation, the keel and deck should be on next week.

Friday, February 12, 2010

"The boat just got a lot smaller"

Lots of boat stuff this time, but first, some atmospherics. I woke up to light snow, fog and low tide last week. None of which is surprising, but when they happen all at the same time (especially first light) the effect on the waterfront is striking.


Inside, there are a few more things to do before we put on the deck. First up, the knees. The big ones are located at the front of the cockpit. These are traditionally constructed knees. One piece, taken out of a piece of hackmatack with the proper grain direction (see the pre launch post from June 2009). These guys were a challenge to fit. They fit tightly against the deckbeam, the sheer clamp, the frame, and, since they are quite a bit thicker than the frame, the planking. A total of 6 faces to get right.


There is also something called a "web knee" in the center of the cockpit. This one is made out of plywood. It serves two purposes, to strengthen the boat as a knee or bulkhead would, and also to act as the center support for the seats. We think they look like toilets.


The last pieces to make before decking are for the cockpit combing, which surrounds the cockpit and helps keep the sailors dry. These pieces are 14' x 8" x 3/4" oak which takes a big bend and twist at the front. So we'll need to steam them. They will not be installed until after the deck is on, but right now we have a lot of things to clamp to which will be covered by the deck. So we set up a bending jig right on the boat (note the carlin is the back 1/2 of the bending jig). . .


Gather a bunch of friends. . .


And voila! The next morning we can take of the clamps. Since these pieces (we did 2 separate steamings to avoid conflict at the front where the 2 combing pieces come together) won't be used for a week or so, we'll clamp them to the bench with some blocking and tensioning devices which will help them keep their general shape until we can get them permanently installed.


While the combings pieces were the last pieces to make, the last thing to do before decking is fair the top of the boat. We aimed to have all the deckbeams and blocking be a little proud of the final deck location. This way, we can put the camber gauge on a beam or a block, see where it hits, shave off a little wood, and repeat until the camber gauge sits nicely across the boat. The one rule is that you can't shave off the sides of the boat, the all important sheer line. This keeps the boat fair going fore to aft as well as side to side. A few places we had a gap in the center of the boat when the camber gauge was resting on the edge. In that case, the deck beams were too small (or we were too aggressive in our planing) and a little shim is required (see the foreground of this picture).


Once we are satisfied the plywood will lie fair on the beams and blocking, it is time for the deck, which is extraordinarily simple after all those fussy knees and bulkheads. You just lie the plywood on the boat, have someone sit on it, and mark out the edges of the boat, the cockpit, the blocking, and the beams from underneath. We can trim it later, so we don't even have the cut out the pieces all that accurately.

The deck will be built of 3 layers. 2 layers of 1/4" plywood covered by a coat of Dynel wet out with epoxy. The Dynel is the petroleum age version of canvas. Very non-traditional. One might ask after all that plank on frame stuff why switch to a more modern construction method? Turns out traditionally build decks simply do not last that long. They leak and cause problems with all those pieces we just installed (deckbeams, blockings, etc. . . ) Since these leaks are invariably fresh water in tight spaces, they lead to rot. So the decks often become the place of compromise for even the most fervent traditionalists who scoff at the idea of a cold-molded boat being called a wooden boat.

Back to the first layer of decking. This layer will be temporarily screwed down while a flexible marine glue (we use sikaflex) sets up. First we paint the bottom of the deck (much easier now than later, especially in the watertight compartments fore and aft). Remember how we scribed off where the deckbeams were? These marks allow us to tape off the deck support locations so we have a good glue surface (which paint is not).


And now some before and after pics, which caused our instructor Kevin to give me the title for this weeks post. . .


Saturday, January 30, 2010

Getting ready for the deck

Seems like I get to do something new everyday now. Instead of planking for, say, 2 or 3 months on end, now each piece of the boat takes a day or so. Even the parts which take a few days, like the carlins or bulkheads, take a different step each day rather than doing the same thing over and over. All in all, good fun. Every morning I wake up excited thinking about what goes on next.

Last time, the deckbeams were installed. All except for those around the cockpit opening, since the deckbeams can't go all the way across the boat. Around the cockpit there is a special deckbeam, called the carlin, which goes fore and aft, held in place by little 1/2-beams. This was one of the more interesting things we've installed on the boat, so I may bore you a little with the details here. The problem is the carlin is a curve, in 3D, somewhere out in space. And of course there are 2 of them and you want them to look the same. To get them right, you need to build a new mold inside of the boat. We used 2X4s clamped across the boat onto the sheer clamp. From the plans, I then figure out how far the carlin is from the side of the boat at a few places. I can then run a batten through these points on the 2X4s


The next step is to figure out how high the carlin is. Where the batten crosses the 2X4s, we screw in some additional 2X4s going up and down. Then we place the camber gauge across the boat and mark the 2X4. (Recall the camber gauge represents the curve of the top of the deck. . . we used it to get the curvature of the deckbeams). Voila! The mark represents the location of the top inside corner of the carlin. Not only do I now know where the carlin goes, I have a mold onto which I can clamp it into place.


We can't quite get the carlin into place yet because at the front and back the deckbeams are in the way. However, we do have the proper shape, the carlin is just sitting a little bit high. Since we have the correct shape, we are able to make our marks for the fore and aft joint, getting the correct angles and length.


After we cut the joint (the carlin fits into a notch we cut into the deckbeam), now we can install the carlin. We leave it clamped up with the 2X4 mold in place until we get the 1/2-beams installed as well. Even then, we leave a little structure in place to hold the carlin down until we can get the deck on.


Although you could put the deck on now, you'd have to be a little crazy. There are a bunch of other pieces which can be installed now which would be much more difficult once the top is on.

There are watertight bulkheads fore and aft, which will prevent the boat from sinking in the case of a knockdown.


Also, plenty of blocking along the centerline to stiffen up the deckbeams and provide backing for deck hardware.


Finally, Phil spent a day fairing down the aft end of the boat, so we're getting our first view of that dead sexy raked, curved transom that was driving me crazy a few months back.


Next time, knees and cockpit combing.

But before I go, figured I'd post some other shop pictures, since the place is really humming now.

Next to the mermaid, the Haj is almost re-framed, re-planked, re-stemmed, and re-transomed. If you look closely in this picture you can see the difference in color between the planks. They replaced every other one in order to close all the gaps.


Upstairs the small boats are pretty much planked. The A&R. . .


And the Whitehall. . .


Then way, way, upstairs, the Susan Skiff factory is in full swing. There are also 3 molds downstairs, so we'll have 7 Susan Skiffs going soon. Perfect opportunity for a susan skiff race to the lighthouse and back this spring.